

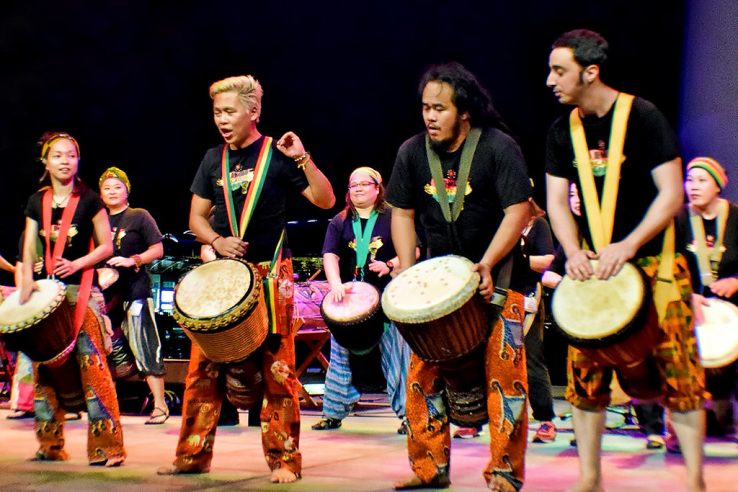
How to Integrate World Percussion into a Modern Arrangement
This has probably happened to every music producer. You spend the whole night putting a track together. Everything is perfect, solid, and ready to go
But the truth is, even a well-programmed beat can still feel stiff. The kick is tight, and the hats are locked to the arrangement grid, but every hit lands with the same weight and the same attack.
A hand-drum part can fix that. It puts accents where your programmed kit doesn’t with some of its slightly off-timed rhythm, and its quieter strokes fill the gaps the kit leaves open.
However, if you simply drop a loop, your programmed drums and percussion loop can start fighting for the same space.
Give Every Layer One Job
Before you decide to use a single loop, decide what the new layer is there to do.
If it’s there to hold the pulse and rhythm, a steady shaker usually does the beat. Producers tend to use shakers as a way to reinforce the subdivisions between kick and snare. You want to keep it secondary to the main drum accents, though.
A djembe slap on the offbeat punctuates the groove, and a low darbuka stroke right before the downbeat pulls the listener into the next bar. One taiko hit at the end of an eight-bar phrase can announce the next section all by itself.
For texture, let a gong ring out across a section change, or tuck short metal hits into the gaps around the main rhythm.
Mute the new layer for eight bars and listen to what changes in the groove. If you don’t miss it, leave it out.
I apply the same test in the studio. For our world percussion library, we recorded djembes, darbukas, shakers, and plenty of other percussion at several dynamic levels, plus a big set of one-shots, so we could build each loop hit by hit and control which sounds played together and how hard each one hit. Adding more percussion didn’t always improve a loop, and every instrument we kept had to bring something the others didn’t.
Fitting the Loop to Your Tempo
Most of the loops I use from World Percussion Loops and Samples by BC, runs at 110 BPM. Now, odds are your track doesn’t. So before you slice anything, audition the loop at your project tempo and listen for time-stretching artifacts and noise. Watch the reverb tails too, since they’ll get in the way of clean edits.
Say you’re working on a house track at 124 BPM. This means the loop has to play about 13 percent faster.
Fundamentally, the process slightly differs in different DAWs. In Ableton Live, set the clip’s warp mode to Beats with Preserve set to Transients. In Logic Pro, Flex Time’s Slicing mode cuts the audio at transient markers and moves the slices without stretching them, so the attacks stay sharp. Solo the result, then check it against your drums for tails that get cut off too abruptly.
A 90 BPM hip-hop beat is the opposite problem. The same loop now plays about 18 percent slower and runs about 22 percent longer, so listen for gaps between hits and tails that sound unnatural. Logic’s Fill Gaps and Decay controls help there. In Live, try Loop Back-and-Forth under Transient Loop Mode, then adjust the Transient Envelope. And if you want direct control over the rhythm at the new tempo, rebuild the part in MIDI.
First, make sure the transient markers catch the quieter strokes, not just the accents. Then slice the loop into a sampler with Slice to New MIDI Track in Ableton (choose transient-based slicing) or Convert to New Sampler Track in Logic, with Transient Markers selected. Every slice gets its own MIDI note, so you can move or repeat slices by editing the notes. In a mixed loop, each slice includes every instrument sounding at that moment. Check the slice boundaries and playback envelopes for clicks, missing attacks, and tails that end too soon.
Avoid snapping every hit to a straight grid. Those small timing variations are part of the groove. If your programmed drums feel stiff next to the loop, match the drums’ timing to the loop instead of forcing the loop onto the grid. In Live, run Extract Groove on the loop and assign the groove to your MIDI drum clip. In Logic, make a groove template from the Flex-enabled audio region, then select it in the MIDI region’s Quantize menu.
Where It Sits in the Mix
Always start with the kick. Mute the percussion and listen to the kick on its own, then bring in the low djembe or taiko part. If the kick loses definition, the percussion is probably masking the low end, so leave the deepest lows to the kick and bass. A high-pass cutoff somewhere between 80 and 150 Hz is a sensible starting range, and you’ll adjust it in the mix. Don’t lose the body of the drum, though. And check that the lows you’re about to remove aren’t the reason you picked that loop in the first place.
For boxy hand drums, check 250 to 400 Hz first. Find the buildup by ear, start with a 2 or 3 dB cut, and adjust from there. Then bypass the EQ and check that the cut improves clarity without making the drum too thin.
Start with the kick, snare, bass, and lead vocal in the center and let the supporting percussion handle the width. For a wider chorus, pan two of your existing percussion parts to opposite sides, somewhere around 20 to 40 percent off center to start. If they sound too dry next to the kit, send them to the same short room reverb as the drums.
Hand percussion is easy to over-compress. As you pull the threshold down, keep an ear on the balance between ghost notes and accents, especially with a high ratio and a fast attack. When the stronger hits start losing their punch, back off the gain reduction. Parallel compression can add density under the dry part, as long as the ghost notes don’t creep forward. For more bite, bring up the attack with a transient shaper, and check the quieter strokes just as closely as the accents.
Timing the Entrances (and the Exits)
Don’t bring everything in at once. Save the percussion for the moments when the energy should shift: a shaker in the verse, hand drums in the pre-chorus, and the busiest variation held back for the chorus.
Let a darbuka phrase answer the snare every fourth bar, or leave half a bar open for a quick fill. Right before the drop, mute all the added percussion for the last bar and bring it back on the downbeat. For a gradual build, automate a low-pass filter and sweep the cutoff up over the last four bars of the pre-chorus.
World percussion rhythms can work outside world music, too, say in a tribal-leaning EDM track built on an electronic kick and other electronic elements. In fact, using them on different genres can bring uniqueness and character to your track.
Learn the Rhythm Before You Bend It
If you’ve never studied a traditional pattern, maqsum is a good first one. It’s a 4/4 rhythm you’ll hear all over Arabic music. Find a live performance and pay attention to which strokes carry the rhythm and which ones just decorate it.
You don’t have to reproduce the traditional pattern exactly. But once you hear that difference, you know which accents to preserve when you adapt the pattern and which ones you’re free to play with.
Next time you’re tempted to stack a second loop, try removing one accent from the first. You might not need the second one at all.